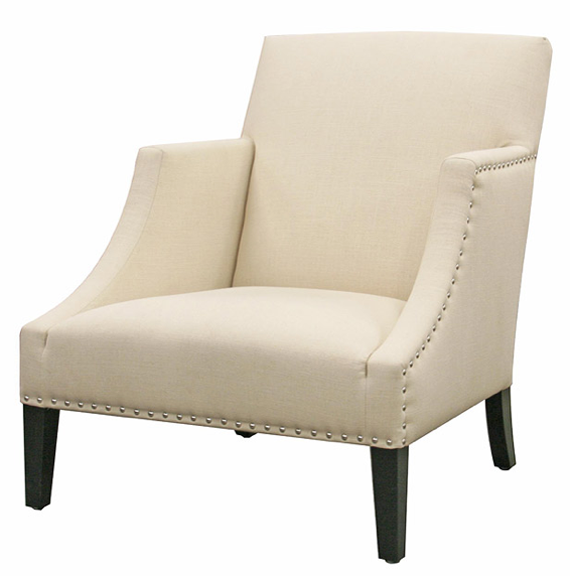
I don't know what I was thinking then a while back when I ordered some cheap chairs on a whim. I had been shopping for a new pair of chairs for a long time, but everything I liked was at least $1500 per chair with my discount (like the Odette chairs below from MGBW). We're thinking of moving in September so it just didn't make sense to shell out thousands for chairs right now. Plus, I didn't want to wait two months to get them.
Then last month we hosted five dinner parties and I was desperate for chairs. I looked on Overstock and Wayfair when I was up against a wall and saw these chairs. They were on sale for $275 each and I had a 25% coupon code and there was free shipping, so I went ahead and just bought them. I liked the shape of the arms (they sort of reminded me a little bit of the Odette chairs) and I liked the nail head trim. And they came in just two days.
When they arrived I was a bit disappointed. They weren't as nice and crisp looking as the photos and they just felt blah. Rather than deal with returning them (and since we *really* needed extra seating), I decided to jazz the chairs up.
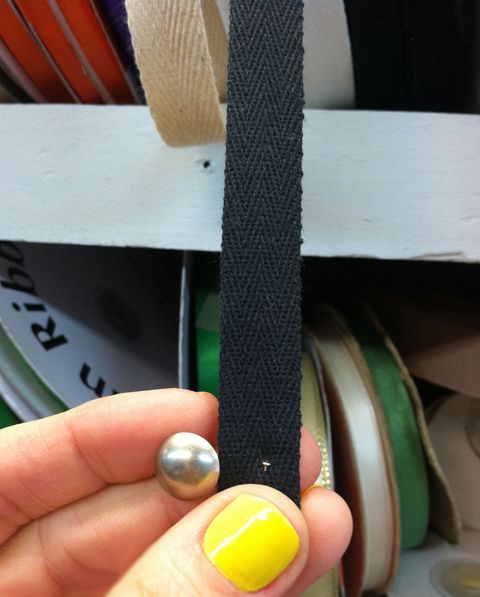
I went to my local fabric store (JEM) and bought six yards of black twill tape that was about the same width of the upholstery nail.
I used these handy staple removers to take out all the old upholstery nails
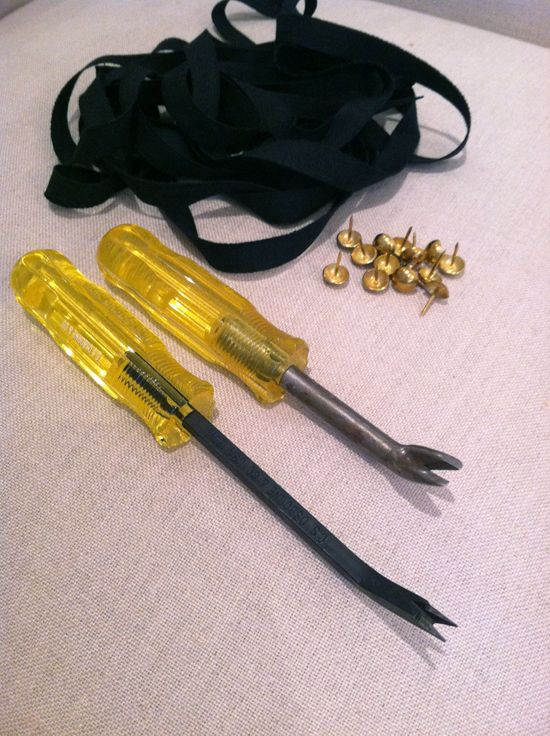
I actually thought the brushed nickel was pretty and would have looked great with the black twill tape, but I have some polished nickel lighting nearby and it was all looking a little matchy-matchy. So I bought some brass nails and brass caster cups for the front feet.
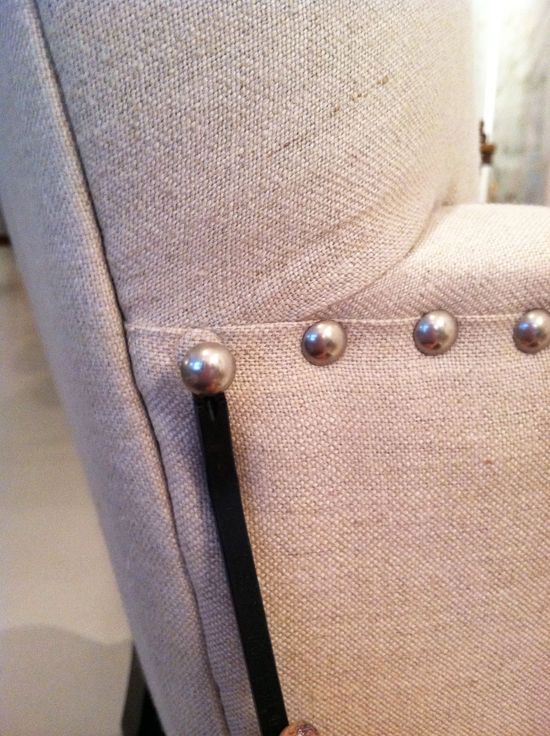
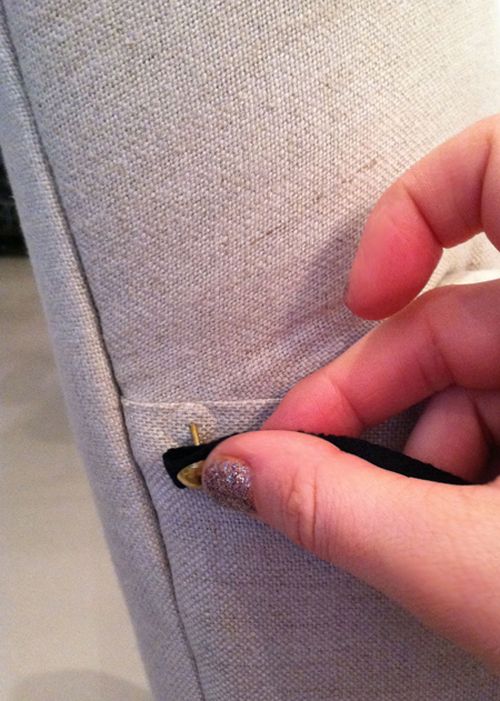
To get started with the new trim job, I just rolled the end of the twill tape under:
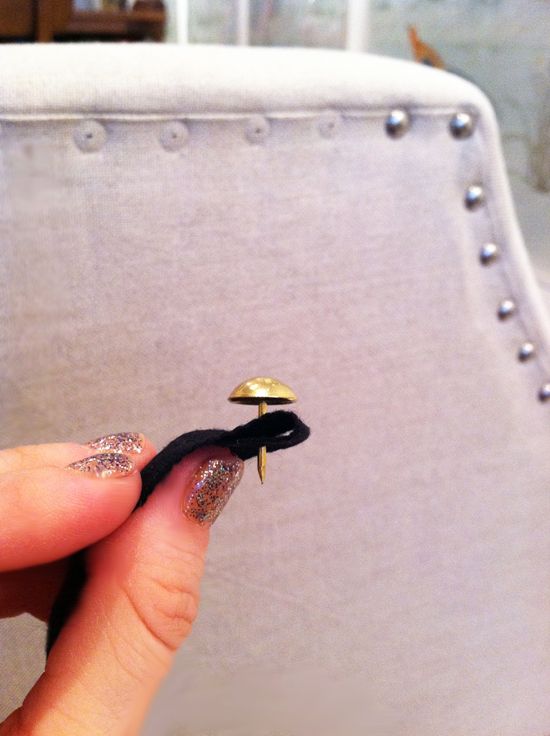
And used the old nail hole to make things really easy.
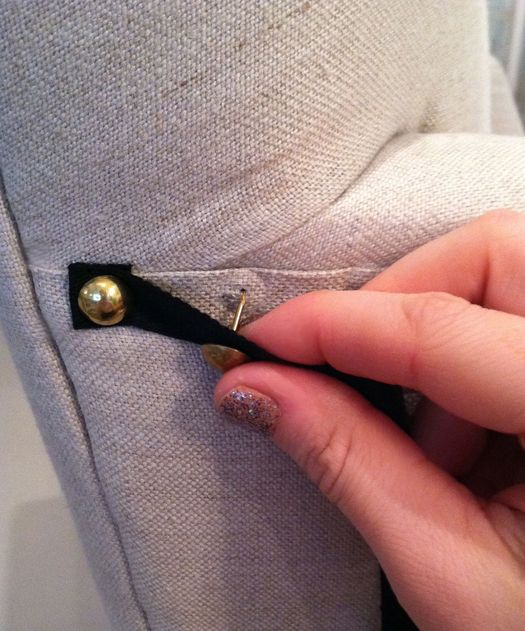
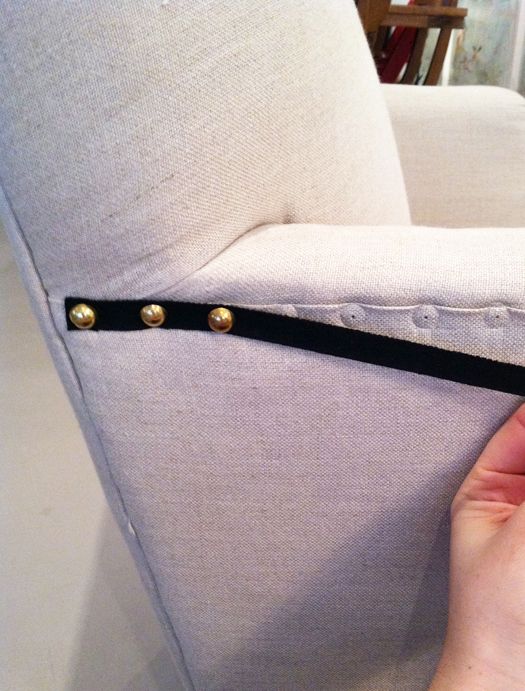
The only real trick to keep in mind is to pull the ribbon tight so there is no gaping between the nails. I also went back and tapped everything in with an upholstery hammer.
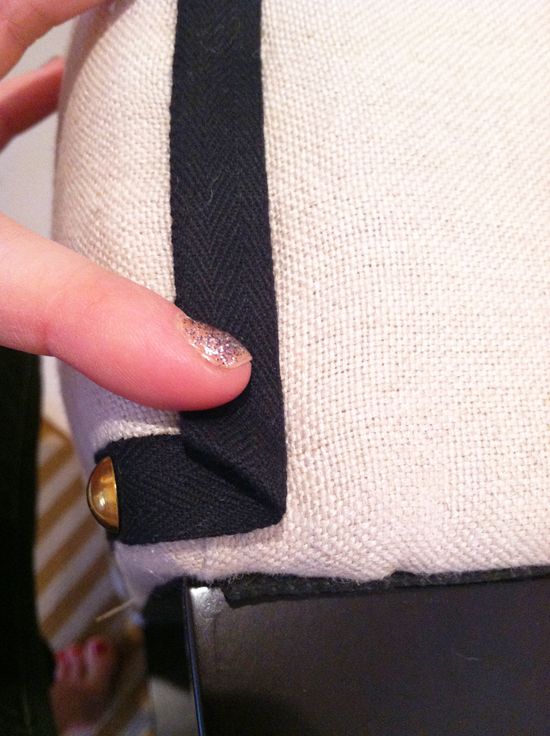
To keep the corners smooth, I just folded the ribbon in under itself and put the nail into the folds.
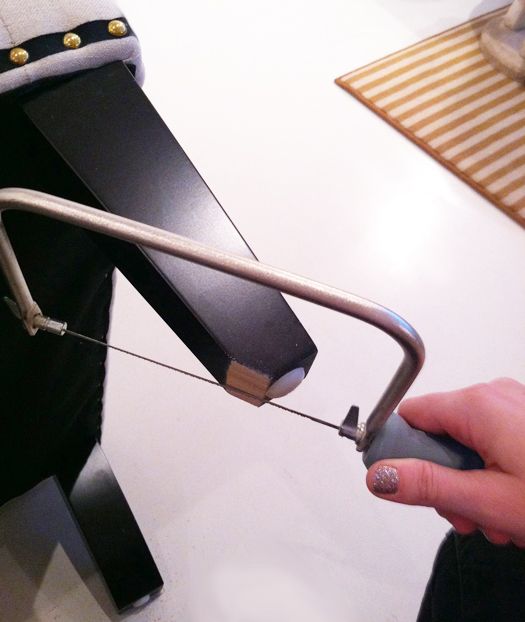
I added brass caster cups from Lee Valley but the legs ended up being a little wider than I expected so I had to cut away some of the wood so the casters would fit right. It was a pain! Totally recommend double checking your dimensions before adding casters!
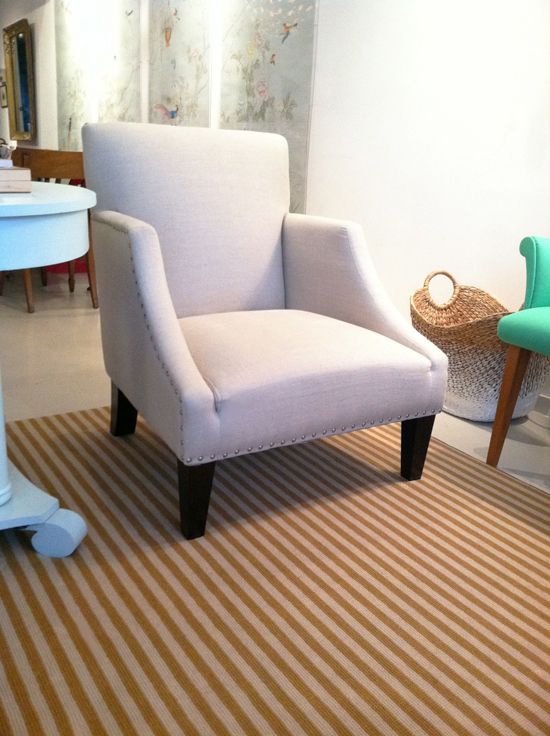
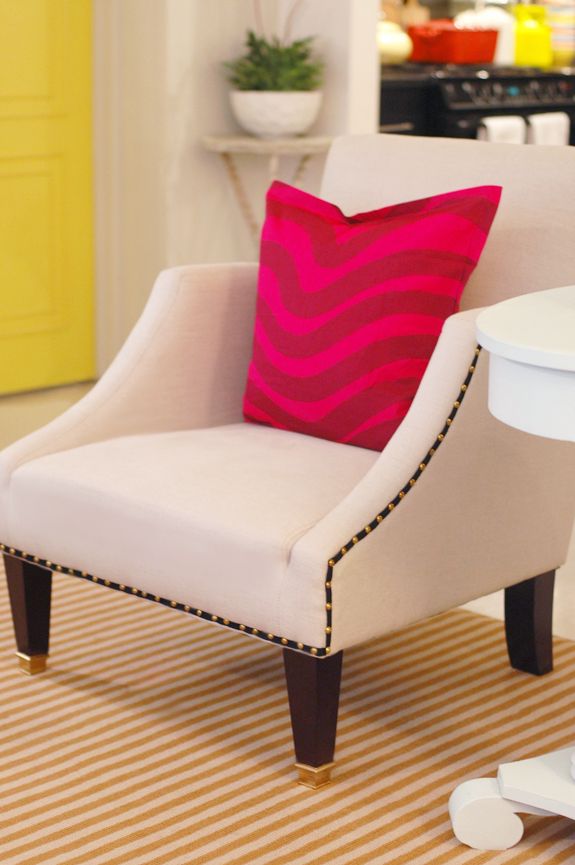
Here's the front view of the finished chairs. It's not a drastic change, but I think the trim and casters help the chairs look a little less cheap.
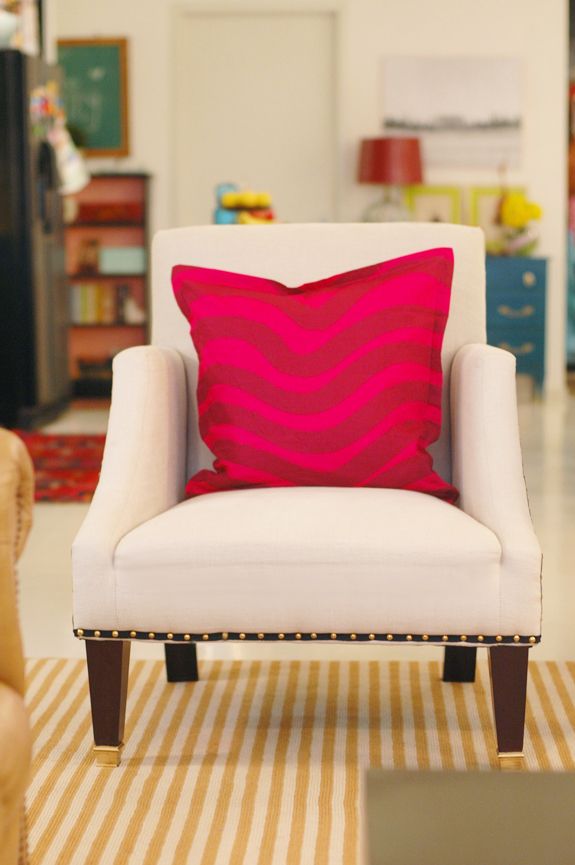
I like them from the side best.
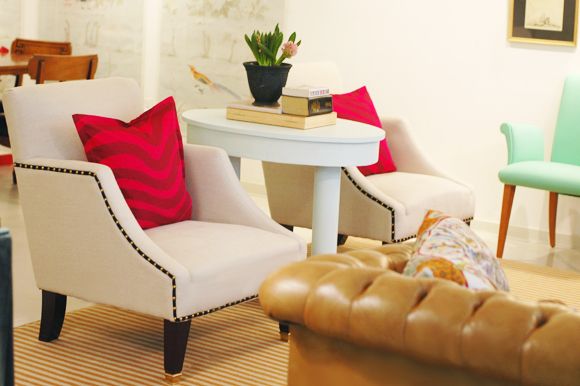
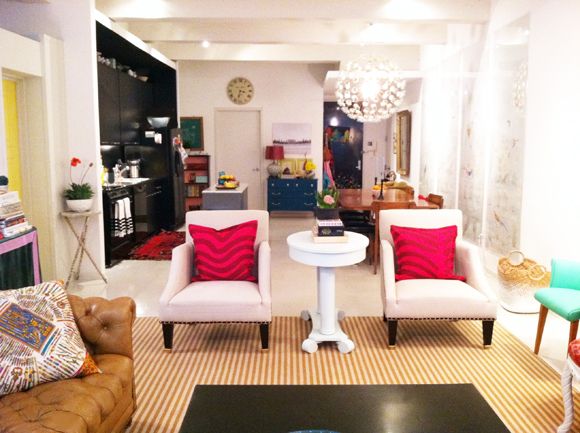
Here's a wider shot of the space. In case you need a refresher here's a link to our floor plan.
They've grown on me. I like the shape of the arms a lot and I think the new contrasting trim highlights the shape. So even though I broke my own rule about not wasting money on cheap upholstery, I think I'm pretty happy with these chairs for now and they fit in well with the mix of furniture styles I have in the space.