There are lots of ways to trim out a chair. Probably the easiest thing to do is buy a ready made welting or gimp. If you get something at the store in a contrasting color it looks less lame/generic. But if you're up for it, I think a self welt is the best option. Double cord welting is awesome for DIY upholstery projects, because it covers a pretty wide area and makes sloppy stapling jobs look great.
Making your own double cord welting is actually pretty easy. Here are the simple steps:

Lay your fabric down and fold it at a 45 degree angle. Cut an inch or two in (depending on if you are doing single or double welting) along the diagonal angle (also called the bias). Cutting fabric on the bias makes it super stretchy - perfect for hugging all the curves of the chair.

You'll need lots of piping, so cut plenty of strips.

I used the strips of fabric to stretch around the perimeter of chair parts to figure out generally how much cording I needed for each area (like the seat back, the chair bottom, the arms, etc.). You'll need to piece the strips together to make cording long enough for each area. Just run a stitch down two pieces, one facing up, the other down, in a upside-down V.

You can buy unfinished cotton cording in all sizes at your local fabric store. It's very inexpensive - usually ten or 25 cents a yard. I used about 40 yards for my two chairs.
The basic idea is very easy. Lay the cording down on your long strip of fabric, fold over the strip and sew in a straight line about a 1/4" inset. You can use a zipper foot here, but my regular walking foot was fine here.

Once that cording has been sewn in, lay down a second piece of cording and roll the whole thing over:

Then simply stitch down the middle, between the two pieces of cord.

When you're finished sewing, trim off the extra fabric close to the seam and you're done!

I used only Magna-tac to attach my welting to the chair frame. Like I mentioned earlier, the glue dries very fast and the hold is very sturdy. I worked in about 10" lengths. I'd apply the glue directly to the cording, wait for just a few seconds for the drying process to get going, then then I pushed the cording down hard into the staples and gaps in the fabric.

While the glues dries very fast, it's a good idea to keep coming back to push in the welting into place while you're working on the rest of the chair. By the time you finish, everything will be securely glued and sitting where it's supposed to!

It helps to really get in the grooves if you sort of pinch the cording together, almost in half.

The bias cut welting really does well with corners. It's super easy to apply with all the stretch and give! If you don't have enough fabric to make bias-cut piping, you can definitely make piping with strips of fabric cut on a straight edge, there will just be more wrinkles and it will be tricky to get your corners completely covered.

There are a couple ways to stop your welting. Probably the cleanest looking method is to roll under the edges, but my piping was too thick, so I just cut the start and stop pieces on an angle. I cut the stop piece a little long. This helped for squishing the cording together and covering up the white parts. I also glued the inside/cut edge of the cording.
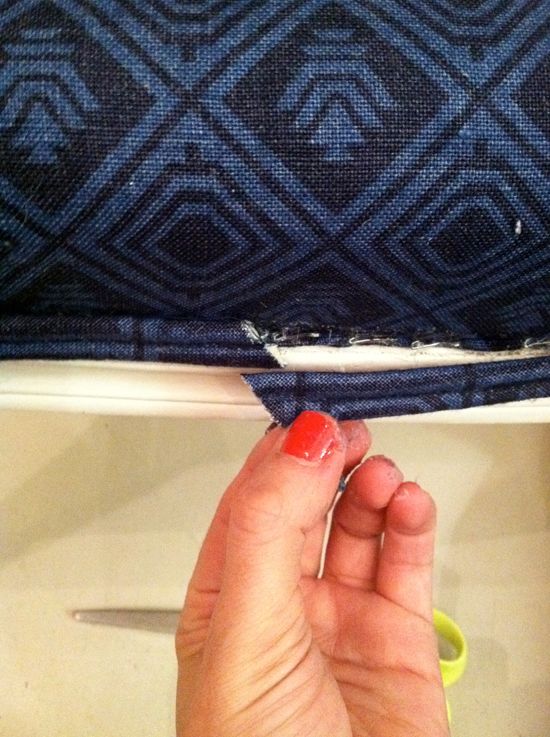
Not completely noticeable, right?

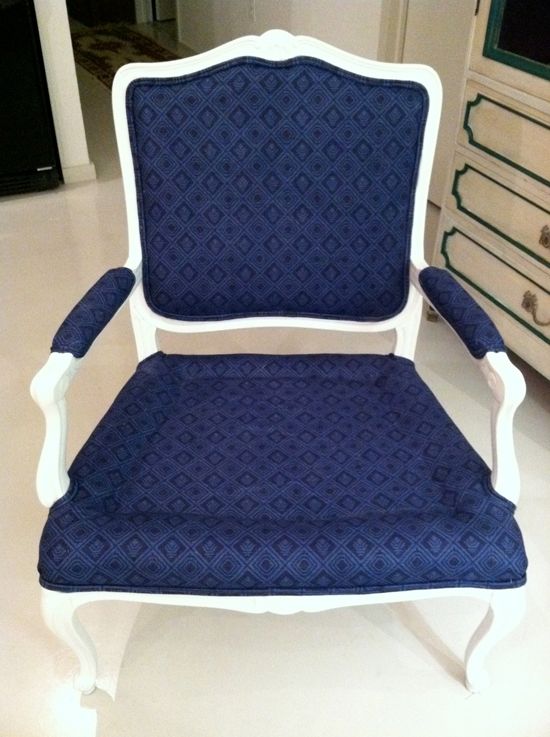
I love how upholstery projects absolutely come to life when the trim is added! Home stretch!

Last step is up next - sewing the cushion! Hint: if you can sew a pillow, you can make a cushion slip cover.